


I had a bad parachute jump while in the military. Long story short – I hurt my knees. Fast forward to September of last year – I’m playing in the yard with my son and BAM! The doctor said I had complete tears in both quadricep tendons and would require surgery to walk again. Turns out it was the recovery process was the worst part! They sent me to a nursing home with my legs immobilized and restricted me to a bed, 24 hours a day for 6 weeks.

Around day three I started teetering on the edge of my sanity. I don’t know where the idea of fly tying came from, but I’m sure it had something to do with this blog. Fly tying was something directly related to fly fishing and I could do it in bed, so it was a natural fit. For the next few weeks, I tied flies for several hours a day, every day. The following is my journey into fly tying. I hope my mistakes can make your experience go smoother.

A Simple Setup Is Best
After some research, I settled on a small vise and basic tool kit. However, figuring out what to tie was the bigger issue. My first approach was to buy a couple of hundred dollars in random materials and see what I could piece together. My wife talked me out of that, thank goodness. Instead, I investigated what worked well in the waters I planned to fish. The first couple dozen flies I tied were absurd. My mentality was “more has to be better.” I used heavy threads, lots of material and exorbitant amounts of glue. As you can see they were everything a fly shouldn’t be.

Start With Flies That Only Require A Few Different Materials
I found that most people recommended Wooly Buggers and Clouser Minnows for the smallmouth I planned on chasing after my recovery. This worked out great because they need very few materials and are simple to tie. When you’re starting out, streamers require less “finesse” than Dry’s or Nymphs. Learning that less is more will help you immensely when you tackle more complex and smaller flies.
Get Familiar With All The Tools
Sounds like a no brainer but trying to figure out how to adjust your tools as you tie is a road paved in frustration. I can’t tell you how furious I got trying to adjust the tension on my bobbin while I was in the middle of tying. Learn how to adjust the jaws of your vise with different size hooks. Figuring out how to properly use a whip finish tool, which I called “my kryptonite”, will save you from trying to reinforce a bad whip-finish with gobs of glue. Everyone’s different and you need to find what works for you but getting familiar with your tools before you tie that first fly will give you a more enjoyable experience.
Tie With A Plan
Tying with a plan is something I can’t stress enough! In the beginning, I would just start tying and get materials out as needed. I would finish a fly with material strung about, all mixed together in a giant mess. This might work if you have unlimited space but that’s unlikely when you start. I hope you never have to try to pick up a spilled package hooks from a bed you’re lying in. Pre-selecting and laying out exactly what you need and nothing more will allow you to be more efficient and cut down on the mess. I also recommend keeping a journal of sorts because everything you write down about tying and specific fly recipes is one less thing you’ll have to remember.
The Quality Of Each Wrap is More Important Than The Number Of Wraps
My technique was imperfect, for sure. My wraps were bulky, I would make 3 or 4 times the number of wraps needed because I was under the impression that “more is better.” Take the time to make each wrap matter, allow your bobbin to untwist and place each wrap exactly where you want it. Later, this makes tying smaller flies easier because you only get a few wraps on small flies before they become bulky.
Finish Each Step Of The Process With A Dab Of Superglue
Glue was my crutch! In the beginning, I applied all my glue at the end of the tying process. In reality, I was just hiding bad technique with glue. This made my fly’s look horrible and appeared as if I hadn’t tried. Instead, use a small dab to secure your wraps, especially when attaching material like chenille, hackle, marabou, and hair. After you make your first wraps to hold material on the hook, add a bit of glue to secure everything. Trying to use glue at the end makes you wonder why you wasted so much time getting those wraps perfect.
Great Lighting Is A Must
In my situation, proper lighting was a constant struggle. I couldn’t get a dedicated tying lamp or even a simple desk lamp. If your situation allows it and you have the funds, a lamp specifically for fly tying is a must. I ended up using an ordinary headlamp. While not ideal it worked well for me, and in a pinch, it’ll do the same for you.
There’s No Such Thing As “Advanced Fly Tying Techniques” – Just Advanced Applications Of Basic Techniques
I started this venture with romantic ideas of creating my own fly patterns but soon realized that would have to wait. Remember, you can be creative after you learn the basics. Once you feel comfortable with the craft, then you can be artistic, but until you reach that moment – keep it simple.
Don’t Get Discouraged
When you see elaborate fly tying stations with countless tools, materials, and space, just remember, you don’t need a lot of anything to start tying. While I have a small dedicated desk now, I started out with an 18×24 inch hospital bed tray. Start small. Get a basic vise and a starter kit of tools to start. Then find a few fly’s that will work in your area and buy only those materials. All my materials and tools fit into a shoe box that I kept beside my bed.

Written by James Smith
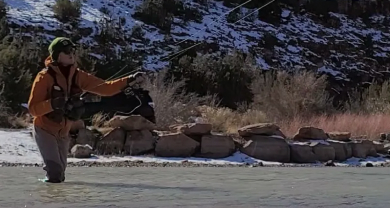
 James Smith, 34-year-old disabled combat infantryman who predominantly fishes warm water streams in western Kentucky, and stocked trout streams throughout the region. Including the National hatchery at Wolf Creek and the tailwaters of the Cumberland River.
If you have something you are passionate about, you can write for us too and get $50 in rewards for your effort! Check out our guest blogger section, here.
Let’s hear some of your thoughts in the comments! Do you know of anyone that has learned to tie as a recovery method like James?

Way to go James! I find tying flies a great way to relax and clear my mind. I’ve been tying off an on for about 70 years. My first mentor was a man who used a pair of long nose pliers held closed by rubber bands as a vise. And he tied mostly small trout flies. As I’ve aged I got into salt water fishing so the flies are bigger and somewhat easier to tie. It’s great fun when winter keeps me away from the water.
Enjoy tying!